Growing mushrooms in bags has become a popular method for both amateur and professional cultivators due to its simplicity and efficiency. This approach allows for precise control over the growing environment, leading to higher yields and more consistent quality. It’s particularly appealing for those with limited space, as it can be done indoors without the need for a garden or large growing area.
Understanding Mushroom Grow Bags
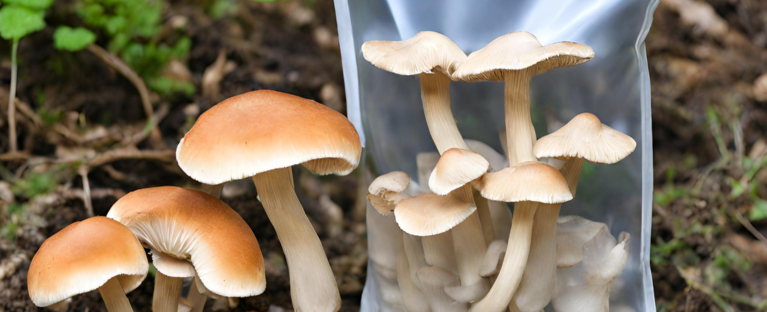
Mushroom grow bags come in various types, including plastic and breathable fabric, each suitable for different stages of mushroom cultivation. They are ideal for a range of mushrooms, particularly species like oysters and shiitakes, which thrive in controlled environments. These bags are designed to maintain the perfect balance of moisture, air, and temperature, crucial for successful mushroom growth.
Step-by-Step Guide to Mushroom Bag Cultivation
1. Selecting the Right Mushroom Spores or Spawn
When embarking on your mushroom cultivation journey, the first and one of the most crucial steps is selecting the right spores or spawn. This choice will significantly influence your cultivation experience and the success of your mushroom crop.
- Types of Mushrooms Suitable for Bag Cultivation: Oyster, Shiitake, and Lion’s Mane mushrooms are among the best choices for bag cultivation due to their adaptability and robust growth.
- Where to Source Quality Spores or Spawn: It’s essential to purchase spores or spawn from reputable suppliers to ensure the health and productivity of your mushrooms.
2. Preparing Your Mushroom Grow Bags
Proper preparation of mushroom grow bags is essential for successful cultivation. This process involves selecting an appropriate substrate and preparing it to create an ideal environment for mushroom growth.
- Choosing the Right Substrate: Common substrates include sawdust, straw, and coffee grounds. The choice depends on the mushroom variety.
- Sterilization and Preparation of the Substrate: Sterilize the substrate to eliminate any unwanted bacteria or fungi. This can be done through methods like pasteurization or steam sterilization.
3. Inoculating the Bags with Mushroom Spawn
Inoculating your grow bags involves carefully introducing mushroom spawn into the prepared substrate. This step is crucial and should be done in a clean, sterile environment to prevent contamination. Evenly distribute the spawn throughout the substrate in each bag, then seal the bags to maintain the necessary humidity and temperature. Store the inoculated bags in a stable environment, ideally at 70-75°F (21-24°C), with high humidity. Regular monitoring is essential; look for white, thread-like mycelium growth as a sign of healthy colonization. Adjust conditions as needed to ensure optimal growth. This careful inoculation sets the foundation for successful mushroom cultivation.
4. Incubation and Colonization
After inoculating the grow bags, the next crucial phase is incubation and colonization. During this period, the mycelium starts to grow and spread throughout the substrate. Store the inoculated bags in a dark, warm place, ideally maintaining a consistent temperature that suits the specific mushroom species you’re cultivating. Regularly check the bags for moisture levels and temperature, making adjustments as necessary to promote healthy mycelium growth. This stage is critical as it sets the stage for the eventual fruiting of the mushrooms. Keep disturbances to a minimum to avoid disrupting the delicate growth process. Successful colonization is indicated by a dense, white network of mycelium throughout the substrate.
5. Fruiting your Mushrooms
Fruiting is the stage where mushrooms develop their fruit bodies – the part that is typically harvested and eaten. After successful colonization, it’s time to create conditions that encourage your mushrooms to fruit. This involves introducing fresh air and reducing the temperature, which signals to the mycelium that it’s time to produce mushrooms. Ensure the environment has adequate light and ventilation, and maintain appropriate humidity levels for your specific mushroom type. Monitor the development of mushroom pins (the early stages of mushroom growth) and adjust conditions if necessary to promote healthy fruiting. This stage is exciting as you start to see the fruits of your labor, with mushrooms growing and maturing, ready for harvest.
6. Harvesting Your Mushrooms
Harvesting is the rewarding phase where you collect the mature mushrooms from your grow bags. Timing is key; mushrooms are typically ready for harvest just before their caps fully open. Gently twist and pull the mushrooms from the substrate, taking care not to damage the mycelium beneath, as this can affect future flushes. After harvesting, store the mushrooms in a cool, dry place and use or process them promptly for the best quality. This stage marks the culmination of your cultivation efforts, offering the tangible, delicious results of your hard work and care.
Troubleshooting Common Issues
Growing mushrooms in bags can sometimes present challenges such as contamination or poor yield. Learning to identify and address these issues is key to successful cultivation. Signs of contamination include off-colors or foul odors, and addressing them quickly is crucial to salvage the cultivation process.
Sustainable Practices and Reusing Grow Bags
Sustainable mushroom cultivation involves using organic substrates and considering the recycling or composting of spent substrates. Some grow bags can be reused for multiple cycles, while others can be recycled or composted after use, reducing waste and promoting sustainability.
Conclusion
Embarking on your mushroom cultivation journey is an exciting endeavor, and growing mushrooms in bags is a great way to start. This method simplifies the process, making it accessible and enjoyable. For all your mushroom growing needs, from quality grow bags to the best substrates and expert advice, turn to Smokin’ Treasures.